Communicating with Voice
SquawkBox allows you to communicate with ATC and other pilots with voice. Text is always available for radio and private communications, so strictly speaking voice is not required to make use of all the features of SquawkBox. But of course communicating by voice can greatly enhance the realism of your flying experience.
SquawkBox provides voice communication over regular radios in your aircraft as well as the ability to join voice channels for private communication.
Using the Aircraft Radios
SquawkBox greatly simplifies the process of finding the right voice channel to join for a particular controller. When in range of an active controller that is hosting a voice channel, simply tune to that controller's primary frequency using your radio stack in Microsoft Flight Simulator. SquawkBox will notice the change in frequency and then join the voice channel automatically. If you use your Flight Simulator radio to leave the active frequency, SquawkBox will automatically leave the voice channel. You can only be joined to a voice channel while you are connected to the air traffic control server.
You can tune both radios (COM1 and COM2) in your radio stack to active frequencies. If you select BOTH on your radio stack, SquawkBox will join both voice channels simultaneously (and you will hear voice communications from both channels, which can get confusing). In Flight Simulator you can only transmit on one of the radios, the one that is selected (COM1 or COM2). Squawkbox mimics this behavior. As such, there is a single push-to-talk key setup for both COM radios. The status bar in the main Squawkbox window indicates which frequencies you are tuned to, and whether they are voice or only text.
The small transponder window that comes with SquawkBox should appear in Flight Simulator whenever you are connected to an air traffic control server. In addition to transponder mode controls, this panel shows the status of the two regular voice channels. Whether you are joined to a channel and whether you are receiving or transmitting on the channel are indicated with small lights. For more information, read Using the Transponder.
Private Voice Channels
Private voice channels operate independently of the voice channels for the aircraft radios. You can manually specify a voice server and channel to join and communicate on that channel at the same time as using the regular radios. Private voice uses a separate push-to-talk key from the regular radios.
To join a private voice channel, click on the SquawkBox Start button, select Private Voice and then Join Channel. This will open a dialog where you specify the address of the voice server and the name of the channel. Enter this information and then click OK to join the channel. Whether the join was successful will be displayed on the main SquawkBox window. To leave the channel select Private Voice and then Leave Channel.
If there are private voice channels that you use frequently, you can save those in a list of favorite channels. Select Private Voice, then Favorite Channels, then Edit Favorite Channels. This will bring up a dialog that allows you to manage a list of your favorites. Those favorite channels will then appear on the Private Voice, Favorite Channels submenu.
When you are in a private voice channel you can invite other users to join your channels. This provides a quick and easy way to get multiple users on a single channel without having to communicate the address of the channel manually. To invite another user, select Private Voice and then Invite User to Channel. Enter the user's callsign and click OK. A message will be displayed on the other user's SquawkBox window inviting them to the channel. If they click on that message they are automatically joined to the channel and that fact is indicated on your SquawkBox window.
If you select Private Voice and then Show Private Voice Panel, a small window will appear that shows you who is in your private voice channel and whether you are receiving or transmitting. To hide this panel, select Private Voice and then Hide Private Voice Panel.
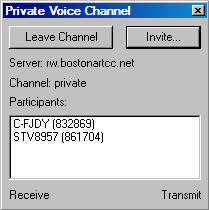
The Private Voice Panel
Push To Talk Keys
All voice transmission in SquawkBox is controlled with push-to-talk keys. There is no ability to use voice in SquawkBox via automatic voice-activated transmission. As indicated above there are two push-to-talk keys: one for the regular COM radios and one for private voice.
If you push a push-to-talk key but are not joined to a voice channel you will hear a buzzing noise. This is to prevent you from erroneously transmitting while no one else is listening. To maximize the flexibility of these keys, select the Allow sharing of Push to Talk keys option on the Voice Options dialog. When this is enabled, if you are on voice on a regular radio but not private voice or vice versa, either push-to-talk key can be used for transmitting.
It is often desirable to use a button on a joystick or yoke to control voice transmission. There are a couple of ways you can do this. First, many joystick drivers allow you to simulate specific keystrokes when you press a particular joystick button. Use your joystick or yoke settings to cause the push-to-talk key to press when you press the desired joystick or yoke button. For more information on this, consult the documentation that came with your joystick or yoke.
The second way to control voice transmission externally is to specify it in the FSUIPC settings. You must have a registered version of FSUIPC to do this. For more information, read Integration with Other Products.
Calibrating Your Microphone
You must calibrate your microphone prior to using voice. The first time you run SquawkBox you will be prompted to do this. If you want to calibrate an additional time you can press the Calibrate Microphone button in the Voice Options dialog. The calibration wizard will guide you through several test stages. When the calibration is complete any problems that occurred will be displayed. If there were problems try to perform the calibration again. If the problems persist, consult the Frequently Asked Questions for tips about achieving better results with your microphone.
Controlling Input and Output
SquawkBox allows you to route output from the various voice channels to separate hardware devices. This could be used to have each COM radio come in a different ear of your headset, or to split the output between a headset and external speakers. All voice input uses the same input device.
To change the input and output devices used for voice, visit the Voice Options dialog. By default all channels share the same output device. But if you uncheck the Use one output device for all voice option, you can select separate devices for COM1, COM2 and private voice.